
Sunday, May 8, 2011
Building a Trellis for the Front Yard
A trellis was made for the front garden bed. It was made super cheap from 8' pine furring strips, they were on special "buy 25+ for $0.74 each." The end stakes were made from 1.5"X1.5"X8' pine wood, about $1.60 each. They were first cut to length and then stained so that each end is coated. The stain used was 2TB neem oil/ 1 pint teak oil to help preserve the wood and fancy it up. The plan is to grow vines such as scarlet runner beans and nasturtiums up the trellis. In the front left is a sunchoke from IFA. Behind and to the right are two nasturtiums. To the far right is one of the rocky mountain columbines and an Asteraceae.

Monday, May 2, 2011
Cedar Garden Box For the Front Yard

 Over the weekend a garden box was built for the front yard. The box was made with cedar fencing and red wood posts. I used cedar fence boards because they are a $1 each and cedar will resist molding better than other woods.
I finished the wood with teak oil to which I added neem oil at about 3TB neem/pint teak oil. The neem oil acts as a natural fungicide and insecticide. It dissolved just fine into the teak oil.
The cedar fence boards had the tops cut off to remove the tapered ends. The length of each board is about 59". A red wood post was cut for each of the four corners and two for the center to bind the cedar posts. I screwed another cedar board across the center to prevent the box from bowing out over time. To add more structural integrity I added a reinforcement piece of cedar fence board at about 29" in from each corner. The runner boards acting as a seat along the top was made from more cedar fencing screwed in place to the red wood posts and where the cedar reinforcements are located. I lined the bottom with newspaper to keep the weeds down, the earthworms love newspaper and it helps bring them in to the area. For soil amendments I added 4 bags of composted manure and 6 bags of organic miracle grow garden soil.


Friday, April 29, 2011
Variety in Theobroma Growth Patterns

 Like I said in a previous post the Cacao theobromas each are different from the next one. I wanted to show a few of the personalities in the group to give an idea of what I mean. This first one has many leaves sprouting from all over the stem with only one large leaf sticking straight up. The second one poked a wedge out of the bean and is now pushing its leaves out, while most others would unfold the bean roughly in half. The third one actually didn't fully lift its bean. Instead it grew the stem out and up from the bean that stayed in the soil. The fourth one crosses its two long translucent leaves across the small one in the center, as if it has anything to be shy about. The final one has bright green leaves and a symmetric square shape. If you click on it you can see the glandular trichomes that covers the leaves and stems.


Wednesday, April 27, 2011
Naranjilla, Goldenberry, Giant Ground Cherry, Marshmallow plant
The first pic is the naranjilla. It is the fuzziest plant I have, and it enjoys strong light. The second picture is the goldenberry which is suppose to be the same species as the third picture which is the older giant ground cherry. The goldenberry also does not grow well in dim light or dry conditions. The fourth picture is the marshmallow plants I started on March 3. Be careful a few have died from being dried out. Here in the fifth picture is the beetberry, these are tough plants that mostly take care of themselves. The final picture is a treat. It's a sea buckthorn, an important member to the family as it is a superfood that fixes its own nitrogen and can grow in cold and dry climates. They can take a bit of drying out without wilting, but are slow growers. Remember that I have documented the germination of all of the plants listed in previous posts.


Greenhouse overview
Most of the pictures listed in this blog will be micro-shots. This is because I want this blog to document the growth and development of individual species. However sometimes it is nice to step back, get an overview, and get some perspective on the process of managing and planning ahead. Here's two pictures taken over last weekend one of each side of the greenhouse. The last frost date in my area is may 5, so many of these plants will be moved out in about a week.


Monday, April 25, 2011
Chocolate sprouts!!! Passiflora edulis update.

 What have I done, what have I done. There are over 100 theobromas growing in the indoors mini-greenhouse. They are getting morning sun with a fluorescent light hanging above shining down. Each one is so different than the next. Some have green leaves, some have dark leaves, and others have translucent pink leaves.
 The last picture shows the Passiflora edulis, they have rich, dark, and shiny leaves. They were shown in a previous post. I water them only about once a week, no fertilizers yet. They are about 3 months old and are happily sharing the mini-greenhouse with the theobroma plants. Both of these plants like humid warm climate the mini-greenhouse supplies, I've read that the optimum humidity for theobroma is 80%. Which would make a lot of plants wilt away.

Sunday, April 24, 2011
Greenhouse Update!

 In order as listed, here are some updates of the plants growing in the greenhouse: Wormwood, Rocky Mountain Columbine, Arrowleaf Basalmroot, Palmers Penstemon, beetberry, desert marigold, and citrus. I would suggest to everyone to have a citrus growing in their greenhouse because it gives off the most amazing floral aromas and overpowers everything else.


Litchi Tomato and Strawberry Husk Ground Cherry Update!
 Well it's only April in my zone 5 and the Litchi and Ground Cherry are rockin' it fa sho'. They are planted in miracle grow organic potting soil with a quart of perlite and a cup of sand added. The first picture is of the strawberry husk ground cherry, which I have about 10 of them in these size pots and each one of them are now flowering.
  I have more of the litchi tomatoes, which are slower than the ground cherry to begin to flower. They are the most resistant to aphids, but when they do get them, their leaves get white spots on them and they wilt away, that's not good at all and I'm very concerned about disease. They are all packing flower buds at the top. I haven't seen the litchi flower yet and this last picture is almost too suspenseful.
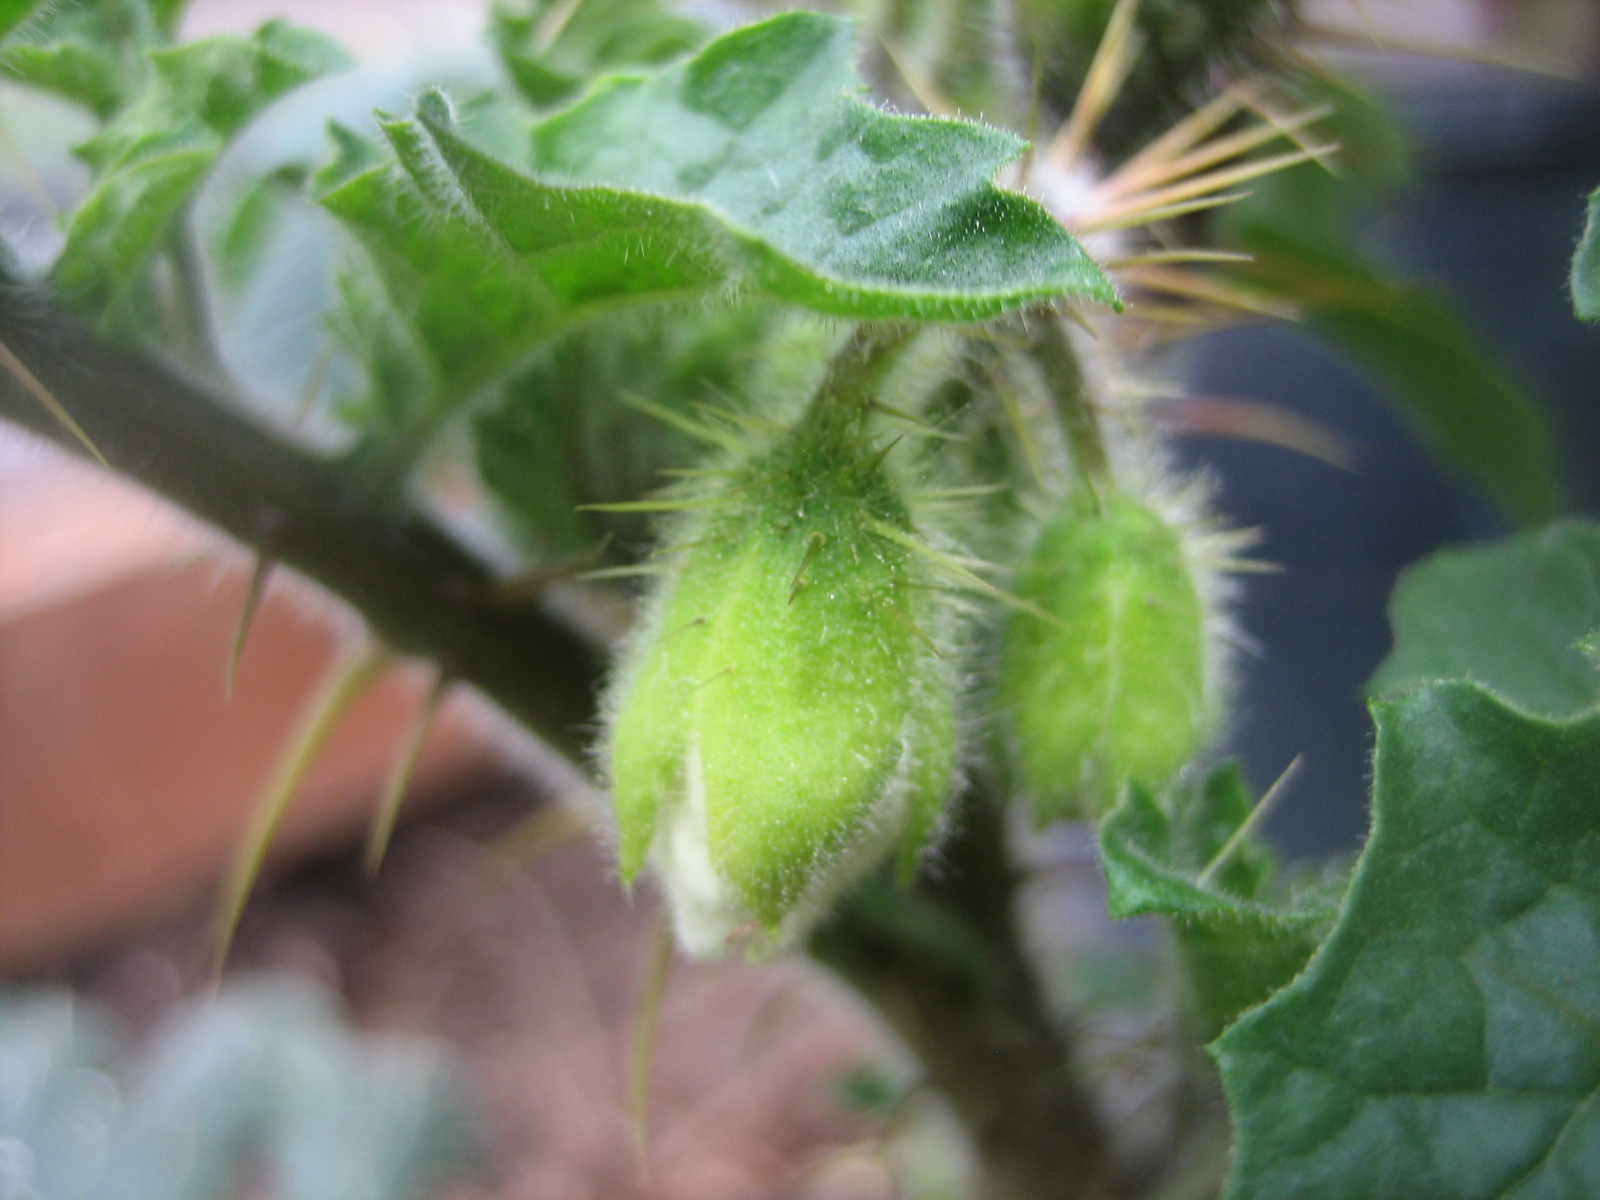
Canary Creeper

 I am a nasturtiumaholic. The flowers wake up your tastebuds with a peppery taste and a sweet burst of nectar. I recently discovered the canary creeper, Tropaeolum peregrinum which is also a member of the nasturtium genus. All parts of the plant are reported as edible, and they have pretty flowers that I can't wait to devour. Here is a picture of the seeds. Only three of them germinated after a month in their cups. This next picture is a 2 week old seedling. It has enjoyed the bright light and humid conditions of the indoors mini-greenhouse.
Luo Han Guo Fruit

Monday, April 11, 2011
PVC Shelves

As I have alluded to, I made this PVC shelving. I once saw PVC shelves being used in a greenhouse. It looked like a great idea because I wanted something that was transparent so that shelving space that isn't in use does not end up blocking light. I also wanted it to be cheap and as a bonus I got all of that and it's super light weight and custom. Here is the PVC shelving. I'm going to eventually extend it so it is twice as long. Must have only been about $10 for the whole thing. I went with the 3/4" PVC to save on money and it is plenty of sturdy.
Saturday, April 9, 2011
1 Month Wonderberry and Chichiquelite Update

Here's how the wonderberry and chichiquelite look since a month ago when I did the last post. these first pictures are of the wonderberry, it was repotted about 4 days ago. It has been relatively isolated from all other wonderberries, but is having 100% success in flowers developing fruits, so I believe it's safe to say wonderberry can self-pollinate. I counted about a hundred flowers/fruits on this little plant and I have more of these plants than I'd like to count now. Several are out in the greenhouse and have been stunted by low temperatures, hopefully they will have a good recovery. Green house updates soon.


The last picture is of a chichiquelite which is in desperate need of a repot and more light for its new flowers. However, it got a light fertilization yesterday.

Friday, April 8, 2011
Cocao Pods: Germinating Theobroma Cacao seeds.
 So I was inspired to grow cocoa after watching some youtube videos by Praxxus55712. I'm going to direct you to go to his link and watch how he does it. He explains everything really well and I would direct anyone else to watch his video I have linked to his name. I just want to document the growth of the plants. The main thing I did differently was the way I mixed my soil. There's a lot of amendments, but I have all these ingredients laying around and organic soil isn't cheap. I ordered the seeds from http://www.montosogardens.com/online_store.htm

 Soil Mix Ingredients: 1 16 quart bag of organic miracle grow, 3 quarts peat, 2 cup forest litter, 1 quart earth worm castings, 1 quart perlite, 1 quart course sand, 2 TB blood meal, 2 TB bone meal, 2 TB green sand, and 1/4 cup epsoma garden lime.
I have heard that the plants are susceptible to fungi and enjoy a rich loam soil. So I made sure to add a lot of sand and perlite with the forest litter. Reading through some of the articles on growing cacao organically, they suggest having different sources of lignin so that is another reason I added the forest litter which is made up of twigs, leafs, and needles. My biggest issue is trying to keep all 8 trays warm enough to germinate them.
Monday, March 28, 2011
New Greenhouse!
 Here's all the pieces to the new greenhouse, not including the base and the window panels. It was on sale at harbor frieght. It's the smaller 6'X8' greenhouse but it was all I could afford at $300.
  The foundation is resting on sand and was made out of four cement anchors with brackets cemented in them and four pressure treated 4X4 pressure treated wood. The most difficult stage in this project was leveling the foundation.
 Below is the finished product. The panels are made from polycarbonate sheets that are corrugulated and have spaces within the panels. The panels were taped with reflective weatherproofing tape to keep moisture from seeping in the insides of the panels through these spaces. The walkway was filled with cedar mulch and it smells so pleasant in there. More to come on the greenhouse and cheap greenhouse DIY shelving.


Thursday, March 24, 2011
Seed update on Wolfberry, Arrowleaf Basalmroot, Rue, and Milkweed

So the camera was lost in one of my coat pockets for a while and I just found it today. Now the seeds were kept a close eye on and all of them germinated. The only one I've actually tried to grow before was the Lycium barbarum(wolfberry or matrimony vine) so I was quite pleased that the others came through. The Milkweed was the first to sprout, a few days later a couple Balsamorhiza sagittata(arrowleaf basalmroot) had arrived along with the L. barbarum. The rue was the very last to come up, but there are now about a half a dozen rue seedlings.
 The first shot is the milkweeds that were locally harvested. The next picture is of the rue. The third are the L. barbarum seedlings, these fruits were bought about two years ago and they still have high germination rates. The B. sagittata are in the greenhouse that was just built and it's too dark to take a picture now, none of the unstratified ones have sprouted yet.
 |
Subscribe to:
Comments (Atom)