Sunday, April 24, 2011

Litchi Tomato and Strawberry Husk Ground Cherry Update!

Well it's only April in my zone 5 and the Litchi and Ground Cherry are rockin' it fa sho'.  They are planted in miracle grow organic potting soil with a quart of perlite and a cup of sand added. The first picture is of the strawberry husk ground cherry, which I have about 10 of them in these size pots and each one of them are now flowering.  
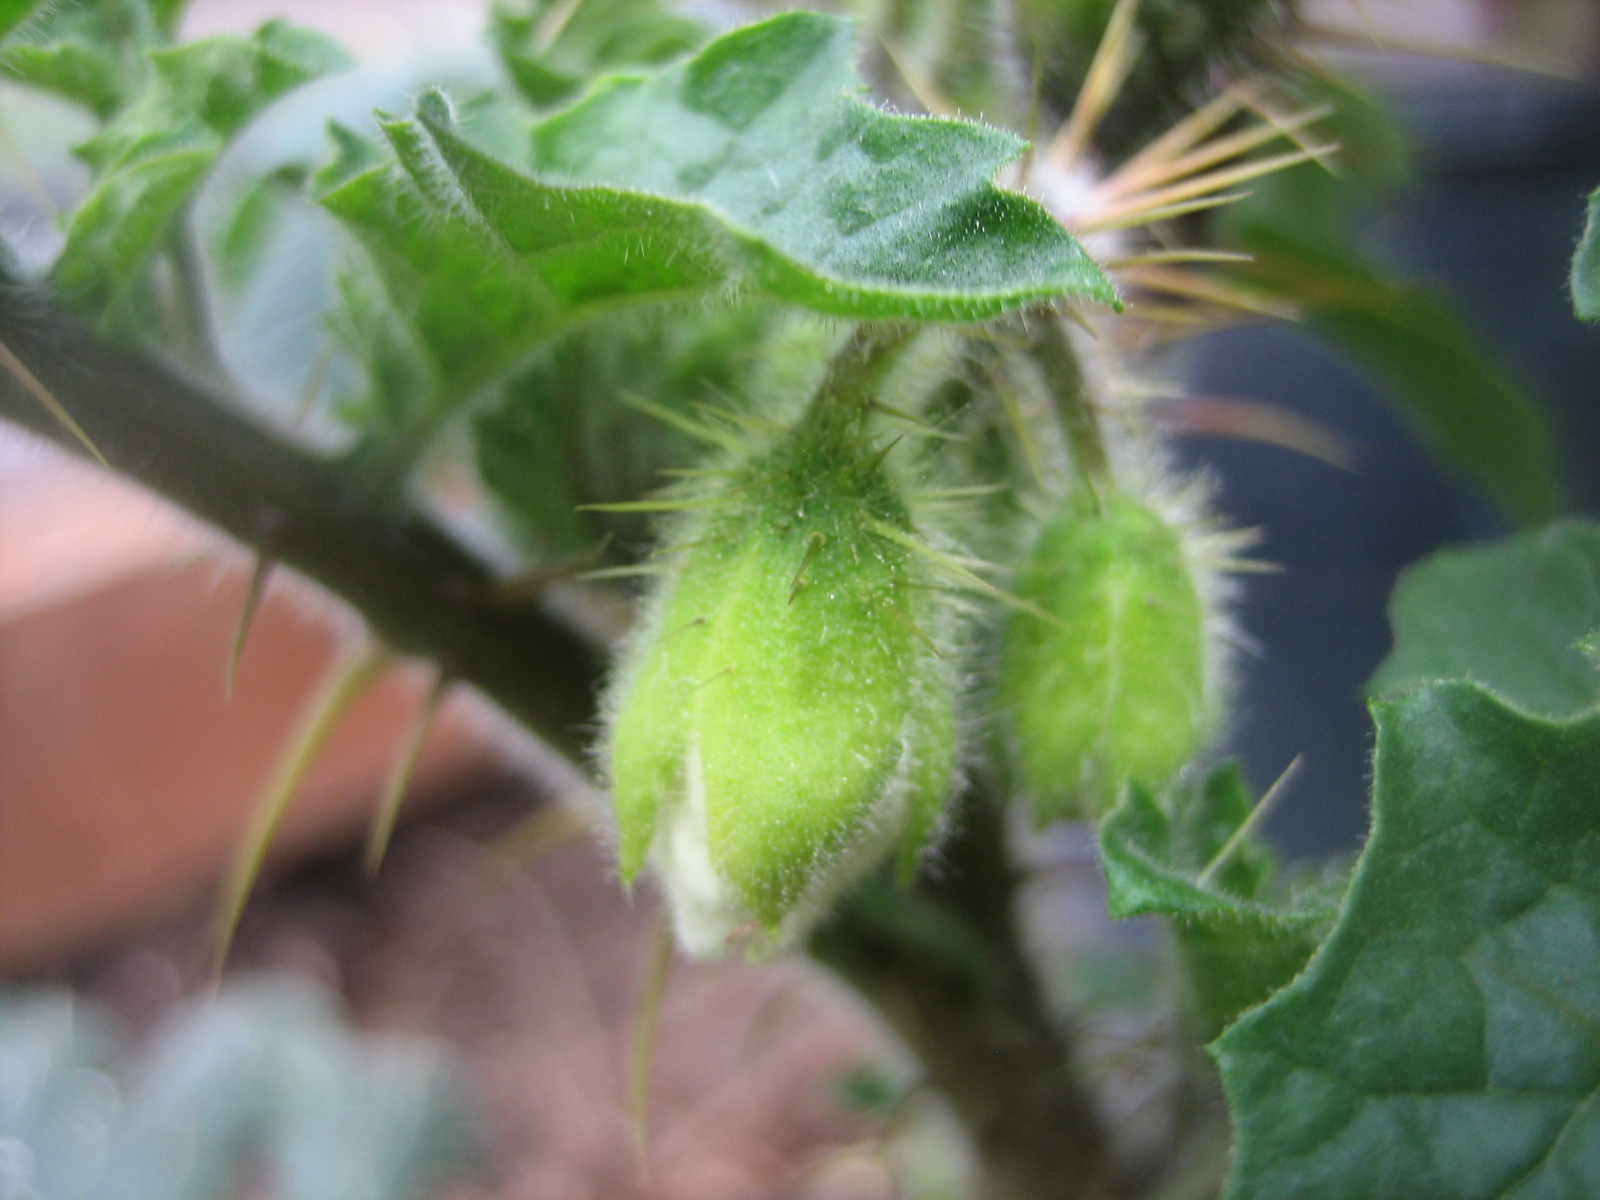
I have more of the litchi tomatoes, which are slower than the ground cherry to begin to flower.  They are the most resistant to aphids, but when they do get them, their leaves get white spots on them and they wilt away, that's not good at all and I'm very concerned about disease.  They are all packing flower buds at the top. I haven't seen the litchi flower yet and this last picture is almost too suspenseful.


Canary Creeper

I am a nasturtiumaholic.  The flowers wake up your tastebuds with a peppery taste and a sweet burst of nectar.  I recently discovered the canary creeper, Tropaeolum peregrinum which is also a member of the nasturtium genus.  All parts of the plant are reported as edible, and they have pretty flowers that I can't wait to devour. Here is a picture of the seeds. Only three of them germinated after a month in their cups. This next picture is a 2 week old seedling.  It has enjoyed the bright light and humid conditions of the indoors mini-greenhouse.

Luo Han Guo Fruit

The Luo Han Guo Fruit, Siraitia grosvenorii also known as arhat, monk's, or buddha fruit is a perennial vine used in chinese medicine and as a sweetener.  I have only seen it used as a tea.  The whole fruit was broke into pieces and steeped in almost boiling water.  I planted these many months ago, none of them germinated, and then this one appeared about 4 weeks ago.  I'm not sure if it is self-fertile so it may never produce fruit.  The plant is native to the mountains of southern China where they get filtered light, mildly warm temperatures, and humid air. I had directly under a fluorescent light and it got yellow spots.  So the strategy is to mimic that environment.  The plant is therefore being kept indoors in a minigreenhouse where it is humid and not too bright.

Monday, April 11, 2011

PVC Shelves


As I have alluded to, I made this PVC shelving.  I once saw PVC shelves being used in a greenhouse. It looked like a great idea because I wanted something that was transparent so that shelving space that isn't in use does not end up blocking light.  I also wanted it to be cheap and as a bonus I got all of that and it's super light weight and custom.  Here is the PVC shelving.  I'm going to eventually extend it so it is twice as long.  Must have only been about $10 for the whole thing.  I went with the 3/4" PVC to save on money and it is plenty of sturdy.

Saturday, April 9, 2011

1 Month Wonderberry and Chichiquelite Update

Here's how the wonderberry and chichiquelite look since a month ago when I did the last post. these first pictures are of the wonderberry, it was repotted about 4 days ago. It has been relatively isolated from all other wonderberries, but is having 100% success in flowers developing fruits, so I believe it's safe to say wonderberry can self-pollinate. I counted about a hundred flowers/fruits on this little plant and I have more of these plants than I'd like to count now. Several are out in the greenhouse and have been stunted by low temperatures, hopefully they will have a good recovery. Green house updates soon.
 
The last picture is of a chichiquelite which is in desperate need of a repot and more light for its new flowers.  However, it got a light fertilization yesterday.
 

Friday, April 8, 2011

Cocao Pods: Germinating Theobroma Cacao seeds.

So I was inspired to grow cocoa after watching some youtube videos by Praxxus55712. I'm going to direct you to go to his link and watch how he does it.  He explains everything really well and I would direct anyone else to watch his video I have linked to his name.  I just want to document the growth of the plants. The main thing I did differently was the way I mixed my soil. There's a lot of amendments, but I have all these ingredients laying around and organic soil isn't cheap.  I ordered the seeds from http://www.montosogardens.com/online_store.htm

Soil Mix Ingredients: 1 16 quart bag of organic miracle grow, 3 quarts peat, 2 cup forest litter, 1 quart earth worm castings, 1 quart perlite, 1 quart course sand, 2 TB blood meal, 2 TB bone meal, 2 TB green sand,  and 1/4 cup epsoma garden lime.
I have heard that the plants are susceptible to fungi and enjoy a rich loam soil.  So I made sure to add a lot of sand and perlite with the forest litter.  Reading through some of the articles on growing cacao organically, they suggest having different sources of lignin so that is another reason I added the forest litter which is made up of twigs, leafs, and needles. My biggest issue is trying to keep all 8 trays warm enough to germinate them.


Monday, March 28, 2011

New Greenhouse!

Here's all the pieces to the new greenhouse, not including the base and the window panels.  It was on sale at harbor frieght.  It's the smaller 6'X8' greenhouse but it was all I could afford at $300. 
The foundation is resting on sand and was made out of four cement anchors with brackets cemented in them and four pressure treated 4X4 pressure treated wood.  The most difficult stage in this project was leveling the foundation. 
Below is the finished product.  The panels are made from polycarbonate sheets that are corrugulated and have spaces within the panels.  The panels were taped with reflective weatherproofing tape to keep moisture from seeping in the insides of the panels through these spaces.   The walkway was filled with cedar mulch and it smells so pleasant in there.  More to come on the greenhouse and cheap greenhouse DIY shelving. 


Thursday, March 24, 2011

Seed update on Wolfberry, Arrowleaf Basalmroot, Rue, and Milkweed

So the camera was lost in one of my coat pockets for a while and I just found it today.  Now the seeds were kept a close eye on and all of them germinated.  The only one I've actually tried to grow before was the Lycium barbarum(wolfberry or matrimony vine) so I was quite pleased that the others came through.  The Milkweed was the first to sprout, a few days later a couple Balsamorhiza sagittata(arrowleaf basalmroot) had arrived along with the L. barbarum.  The rue was the very last to come up, but there are now about a half a dozen rue seedlings. 


The first shot is the milkweeds that were locally harvested.  The next picture is of the rue.  The third are the L. barbarum seedlings, these fruits were bought about two years ago and they still have high germination rates.  The B. sagittata are in the greenhouse that was just built and it's too dark to take a picture now, none of the unstratified ones have sprouted yet.


Wednesday, March 16, 2011

More seed starting Wolfberry, Arrowleaf Basalmroot, Rue, and Milkweed

Over the weekend I had a chance to start some more seeds.  I can't plant enough of Lycium barbarum, Matrimony Vine, goji berries, wolfberries, or whatever else people call them. USDA lists them as matrimony vine, which I like because other members of the boxthorn genus have wolfberry in their name.  I personally feel the seeds are more viable when they are scraped fresh from the fruit.  It can be very tedious to get them out.  Some people say to just soak them and the seeds will settle, but the pulp settles really well too and it takes a long time to seperate the pulp and seed. I personally like to scrape them out.  I rip them in half and then I dip them all in water to soften the bonds between the seed coat and the flesh of the fruit.  Then you can submerge them one by one in a cup of water and scrap the seeds, then discard the fruit.
I like being able to have a catalog of pictures of seeds.  So I'm going to continue that tradition here. The top picture is the fruit cut in half and dipped in water.  The next picture is all the seeds I got out of about 20 to 25 fruits. 


Rue is the next in this series of seeds.  They were picked in late fall and left in their pods until now.  I didn't have the patience to break into each small pod so I pretty much soaked everything but the stems and larger seed pods.

Here are the Arrowleaf Basalmroot Balsamorhiza sagittata.  One day they'll be beautiful Asteraceae, but for now they are just begining to germinate.  They were stratified in my fridge for 2 months with a wringed out wet napkin in a bag. After 12 hours of soaking in the cup they already began to germinate. I did a control group where the seeds were just left in a seed bin at around room temperature, and they didn't begin to germinating.


Finally here are some milkweeds that I gathered at a local garden. The beginning of a greenhouse project has begun at my house so soon there will be a post on that.

Saturday, March 12, 2011

Admitting mistakes: Isopropyl Alcohol and Litchi Tomatos

Well we all make mistakes, and I believe it is a mistake to be ashamed and hide our wrongs.  So I've decided to let all of the evidence be exposed and let others learn.  There is an aphid problem in my young garden and I've tried to use chemicals that won't leach into the plants and soil to poison me.  So I occasionally have used a 3:1 rubbing alcohol to water solution to spray my plants.  After a couple minutes have passed I'll spray off any left over alcohol with plain water.  I used it in my mini-indoor greenhouse and neighboring plants. Well what happened was the greenhouse didn't get enough air circulation and it killed off a lot of the foliage. They survived, but the Litchi Tomato wasn't getting enough light on the shelf it was on and also stretched more than they should. Here's a side by side with a Litchi Tomato from the same batch that was also sprayed, but was outside of the greenhouse.  Be warned, circulate your plants air space after spraying.


The Physalis peruviana varieties Peruvian Goldenberry and Giant Cape Gooseberry

I was getting a little concerned about the Goldenberry, but yesterday morning a couple broke ground.  If you look back at the blog, that puts them at almost a week before coming up.  I noticed this one do this weird trick with its seed shell.  Usually a seedling will slough off the seed shell in the ground or it will grow it's leaves until the seed shell is wedged towards the leaf tips and finally is pushed off of the tips and falls away.  However look at these two Goldenberry pictures below and you can see that they have instead jutted out the tips of the leaves and so instead of being the last part of the leaf to be uncovered by the seed shell, it has become the first.


To the bottom right are some not so big Giant Cape Gooseberry seedlings that sprouted about 9 days ago. They are the same species, but seem as though they might be a different variety than the Goldenberry. It's just a teazer for now, but we'll see how their adult forms look.


This final one is the Litchi tomato seedling with its purple stem. The seeds were planted at the same time as the Giant Cape Gooseberry, but are a lot slower to sprout. 


Wednesday, March 9, 2011

Chenopodium capitatum, Beetberry Sprouted Yesterday!

Yes, I wanted to mention that the Beetberry has manifested itself to me yesterday and to the rest of you today. That means 3 1/2 days from the time it was soaked to the time it sprouted. They have a gorgeous tint of pink to them. 
I'm not sure how this Cucurbitaceae came about, but I didn't have the heart to kill it.  It has turned into a behemeth in the youthful indoor garden. Lets call it Galactus.

Wonderberry and Chichiquelite

Some preface is needed in discussing Wonderberry and Chichiquelite. Wonderberry or Sunberry is a plant whose classication is shrouded with controversy.  Basically, Luther Burbank was a famous botanist who claimed to have bred a hybrid variety named Solanum burbankii in which he sold to a seedsman back here in the states. Modern science has allowed us to look at the DNA of these plants, and it turns out by looking at the stabilization of the hybrid phenotype, and the ploidy of the chromosomes, it is likely to be a plant native to Africa called S. retroflexum.
Chichiquelite is a common name used for S. scabrum(originating from africa) and also possibly incorrectly named as S. nigrum(The Black Nightshade originating from Europe.)  Still others call S. scabrum a Garden Huckleberry, which others insist is actually S. melanocerasum. I purchased these seeds from a great online store called Baker Creek Heirloom Seeds, check under their garden berries section.  They refer to the Chichiquelite as S. nigrum, but still refer to the Wonderberry as S. burbankii. More research is needed on the phenotypes to figure out which species my Chichiquelite really is.
This first picture is of the Wonderberry, followed by a picture of its thick root system.  The last picture is of the Chichiquelite, note the crinkled leaf which occurs on both the S nigrum and the S scabrum. It is easy to understand the confusion.

Tuesday, March 8, 2011

Act III: Sprouting of Absinthium and Glabra

 Yesterday I had to take the Absinthium and Glabra from the germination chamber.  As soon as they sprout it is important to provide light so that they can begin to provide their own energy when the seeds energy reserves are exhausted. The smaller more numerous ones are the Absinthium. The single large seedling is the Glabra. Since they were first presoaked on the night of 03/4 and they sprouted in the morning of 03/06, it took about 60hr. 

Sunday, March 6, 2011

Seperating Passion Flower seedlings

When there are more than one precious seedling growing in one cup often people sacrifice all the others.  I keep getting more passion flowers germinating so I've got to do something about it.

As I've done with many plants, I take my tweezers and cut a hole around the plants of interest. Then I pry them up with the tweezers a little bit all the way around the plant.  I then grasp the plants and pull and pry them up and out. Then I gently wiggle them lose.

 Hover them in their new hole and while supporting the plant shake the pot so that some lose soil drops and suppots the length of the tap roots.  Then backfill the remainder of the hole with soil and water and press plant in place. Now there are 15. The white pots were the originals and all the others are transplants from the white pots, strangely two white pots did not sprout any seeds.


Act II: Sowing Time

It had been 24hr since the seeds were first presoaked so it was time to plant them.  The soil used was a 50/50 blend of some old potting soil and some new organic miracle grow soil.  The old soil was from some dead potted plants.  I threw the whole plant and soil into a storage container and mixed into it one tablespoon blood and bone meal per gallon of soil.   Then it was allowed to break down and rejuvinate until now, or about 5 months later.  The new soil didn't have any perlite in it so I added a few handfuls of that and some leaf litter.  In the fall it is a good idea to save some of your leaves.  This tends to lighten up the mix for seedlings, and I believe it helps to condition the soil. I like to use clear cups.  That way I can see what they are doing and how they are developing above and below the ground.  I only drill one hole in the bottom so I can plug it up if I need to, but also because fungus gnats like to live in them.  Some say the more holes, the more aeration the roots have, but as the soil dries it pulls away from the sides of the cup leaving behind air pockets and the soil is light so aeration is never an issue with a 16 ounce cup.


I add the seeds using tweezers for larger seeds, and a 1ml dropper for small seeds.  It's kind of cute watching the float around in there too.  The dropper is by far the most noninvasive procedures for planting soaked seeds that I am aware of. When using the tweezers I literally just push them into the ground(about three times their seed diameter) and then let go of them.  When using the dropper it can be difficult to spread the seeds thinly so I often stir them in. 


Make sure the soil is already somewhat wet before you add the seeds.  There needs to be a good deep soaking to make sure the seeds aren't being dried from the bottom up.  After the seeds are planted, again water the soil and pat gently to insure good contact between the soil and seeds.  If the soil was already really moist, not so much water will be used that you run the risk of washing away the seeds. I ran out of plastic trays so I used some pizza boxes I save for drying seed balls.  Look at this space saving germination tower.

I've made sure to cover my seeds so I don't have to spray the surface all the time.  The heater mat from the earlier photos was thrown in for extra warmth.  The temperature in the morning was 72°F.